User Guide
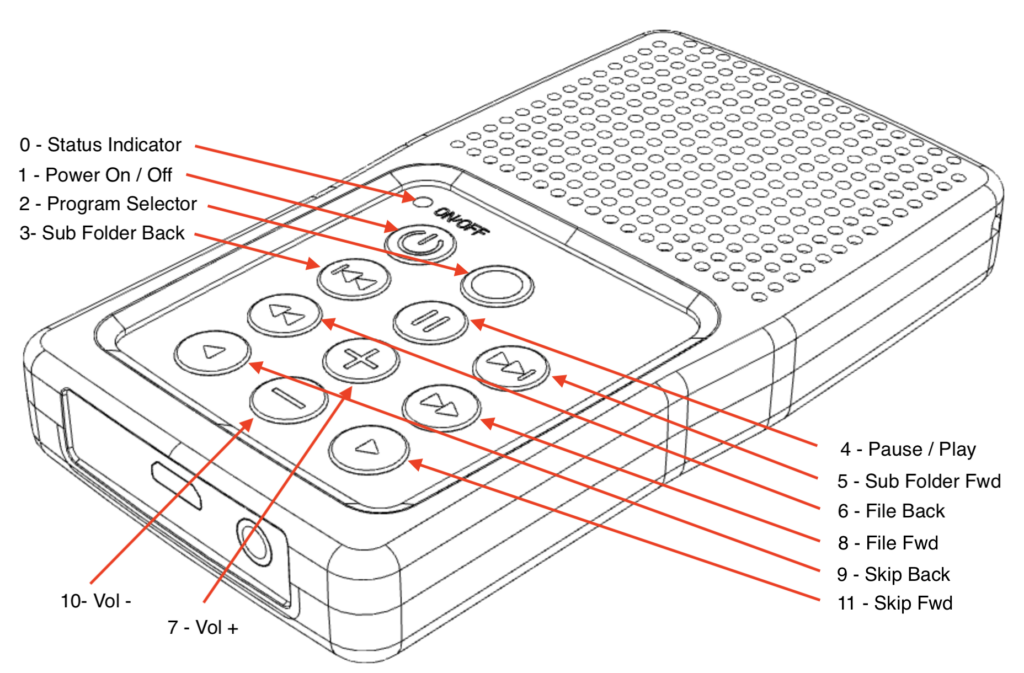
0 – Status Indicator  :
:
This LED indicates the current operational status of the player.
Flashing Green  = Playing – the player is playing the selected content
Solid Green  = Paused – the player has been paused and is not currently playing content
Blue  = Receiving Solar Energy – The brightness of the Blue LED indicates the sun’s battery charging effectiveness. Example: A bright blue light means the player is receiving direct sunlight and will charge much faster than if the Blue LED is dim
Flashing Orange  : Battery low (Within 30 mins of auto shutdown) The player is designed to shutdown automatically on low battery to help extend battery life by keeping it from becoming fully discharged
Red  : Battery Discharged. Place in sun or connect to a USB Micro charger and cable to replenish the internal battery’s charge
Flashing Red  : Battery is charging via the USB Micro Cable
1 – Power On/Off  : Turn Player on or Off
Press the power button until the LED turns on. This extra long press is required to help protect against accidental power on or power off while carrying the player in a pocket or purse.
2 – Program Selector 
Quick pressing the program selector will change programs. For example: If sermons are playing, the program will switch to scriptures. Conversely, if you are in scriptures, pressing the Program button will switch to Sermons.
Note: The player has a memory function that will “remember” your progress in a particular sermon or scripture. This function serves as an electronic bookmark and allows the listener to switch between scriptures and sermons without losing their progress.
3 – Book Back 
Quick pressing this button returns to the previous sermon series or book of scripture, depending on which program you have currently selected. Example: If the book of Mark is playing, pressing this button should move your listening to Matthew 1.
4 – Play / Pause 
Quickly pressing this button switches between play and pause modes.
5 – Book Forward 
Quick pressing this button advances to the next sermon series or book of scripture, depending on which program you have currently selected. Example: If the book of Matthew is playing, pressing this button should move your listening to Mark 1.
6 – Verse Back 
Quick pressing this button returns to the previous chapter or verse of a sermon series or book of scripture, depending on which sermon series or scripture book you have currently selected. Example: If Luke, verse 6 is playing, pressing this button will move your listening to Luke verse 5.
7 – Volume + 
Quick pressing this button will increase the volume of the speaker or an attached headphone set. Pressing and holding this button will increase the volume more rapidly. Audible beeps will be heard when the volume reaches its maximum level. The player will remember its previously set volume level after powering off and then back on.
8 – Verse Forward 
Quick pressing this button advances to the next chapter or verse of a sermon series or book of scripture, depending on which sermon series or scripture book you have currently selected. Example: If Luke, verse 5 is playing, pressing this button will move your listening to Luke verse 6.
9 – Skip Rewind 
Pressing and holding this button will scrub backward through a selection rapidly. When you have reached the desired passage, release the rewind button to continue listening normally.
10 – Volume – 
Quick pressing this button will decrease the volume of the speaker or an attached headphone set. Pressing and holding this button will decrease the volume more rapidly. When the volume reaches its minimum level, it will be muted. The player will remember its previously set volume level after powering off and then back on.
11 – Skip Forward 
Pressing and holding this button will scrub forward through a selection rapidly. When you have reached the desired passage, release the skip forward button to continue listening normally.
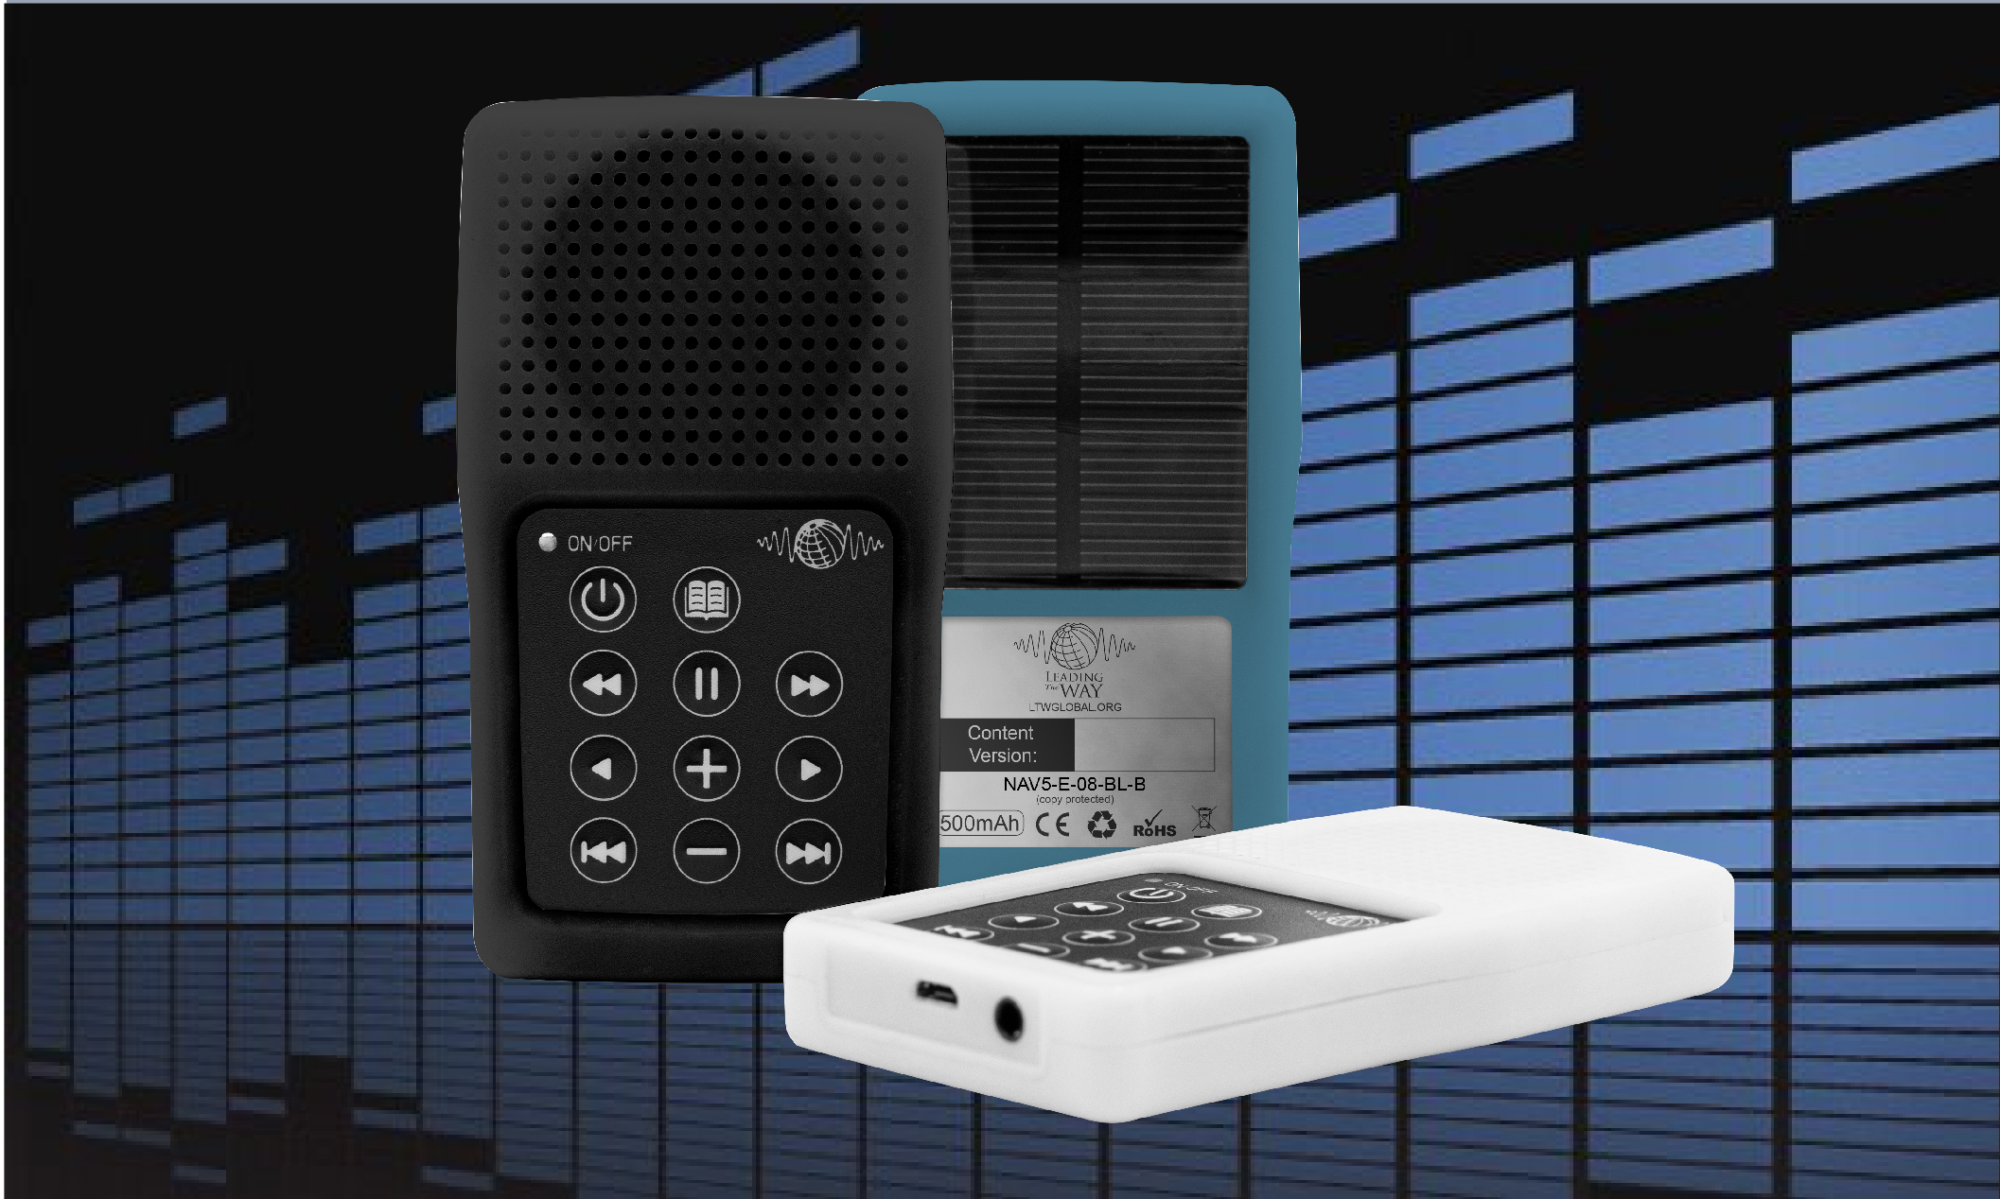
On the bottom of the player, you will find a USB Micro charging cable. You may use any USB Micro cable and/or wall charger combo to quick charge the player, if desired. Next to this charging port can be found the the audio output jack. It can be used with any stereo or mono headphone set. Insertion of an audio plug into the jack will disable the built in speaker, for private listening.
Simple Tips
Your player is designed to provide years of listening and studying enjoyment. These simple tips can help you extend the player’s service life.
1.) The player is water resistant but DO NOT fully immerse the player in liquids. If you accidentally drop it into a liquid, turn it off immediately and store it in a dry place until it is fully dry both inside and out. Turn the player on and continue to use it normally.
2.) Take care not to crush the player’s housing. Always place the player a safe location, where it is less likely to be accidentally damaged. Example: A front pocket is a better carrying location than a rear pocket.
3.) Frequently charge the player by connecting the player to USB power, or placing it face down in an area with access to direct sunlight. (Solar Panel facing the sun). Expect solar charring to take more time than USB charging.
4.) Wipe the player with a cloth and warm soapy water to clean. Pat dry with a towel. Do not use harsh chemicals to clean the player.
5.) Take care not to excessively scratch or damage the solar charging panel. Scratches and abrasions reduce the solar charging effectiveness. (You may remove the protective film from the solar charging panel if you wish).
